Microsoft Azure IoT Hub is an IoT managed services platform that enables message routing of all IoT devices and applications to transfer data through the cloud. With its integration to a Device Positioning Service (DPS), you can connect thousands of devices with Azure IoT Hub automatically.

With the advancement in Cloud Computing, it is now an essential backbone of all IoT devices and applications that make it possible to connect, manage, secure, store, and retrieve data generated by such applications. Apparently, to develop an IoT application, Cloud Computing and focused services such as Edge Computing are of utmost importance.
Let us explore through this article to understand how you can use Azure IoT Hub to build and manage IoT projects.
Understanding Azure IoT Hub
Before going deeper into this topic, let us understand some of the key components of Azure IoT Hub.
• Device Identities
Each device that is connected to Microsoft Azure IoT Hub has an Identity. Luckily, all device IDs are created and managed dynamically while you integrate them with other applications. Every device is automatically assigned an ID the moment it is successfully connected to the IoT Hub. With an ID and device twin, it is easier to monitor the hub fleet and identify devices easily when required.
• Device-to-Cloud Message
Device-to-Cloud (D2C) messages are typical for IoT devices where each device that is identified and registered in Azure IoT Hub has a message stream that is unique to itself.
IoT devices and applications can send telemetry and alert data to IoT Hub for processing or rerouting to other services as defined by the developer. By default, all received messages go to the built-in endpoint D2C messages. Connected devices can thereby access this endpoint through MQTT, AMQP, and HTTPS requests.

• Shared Access Policy
By default, you are granted full access to your Azure IoT Hub, but any other applications don’t. For instance, if you need to manage your devices with Particle, you will require to grant it access to do so. That is only possible through a Shared Access Policy.
Azure IoT Hub administers access permissions by comparing a received token with access policies. Depending on the shared access policy granted, Particle can send the device’s data, access message stream, and perform many other functions. However, granting permission comes with security issues that you need to be aware of as a developer.
• Device Twin
Monitoring of IoT devices takes place 24 hours every day of the week. For that to be possible, there should be a virtual copy of that device in the cloud. In IoT Hub, the device state is stored as a JSON string to represent the Device Twin.
The Device Twin on IoT Hub is used to perform the following:
- Store metadata that is specific to the device, for example, the location of the connected devices.
- Give a clear report on the device’s availability, capability, and condition. If your IoT device uses Wi-Fi or cellular data to connect to the IoT Hub, then you can access that information from the Device Twin.
- Query configuration, metadata, or state of your device.
- Synchronize the state of any ongoing activity between the device’s firmware and back-end app.
Pre-configuration in Azure IoT Hub
Before you can experience the full capability of Azure IoT Hub and integrate it with any other services, you have to configure it. The following section is a walkthrough on how you can get started with the cloud service and integrate it with Particle for easier device management.
• Sign up for an Azure account
Go to the Microsoft Azure signup/sign-in page. If you don’t have an account already, then you can create a free tier account by clicking Try for free. A newly registered account receives $200 usage credits after successful signup.
• Creating an Azure IoT Hub
You need to create an Azure IoT account to be able to manage your connected devices. Creating an IoT Hub is an elaborate process that requires attention.
Disclaimer: For the purpose of this article, we are taking the reference of the Particle application to be connected with our IoT Hub instance.
Follow these steps:
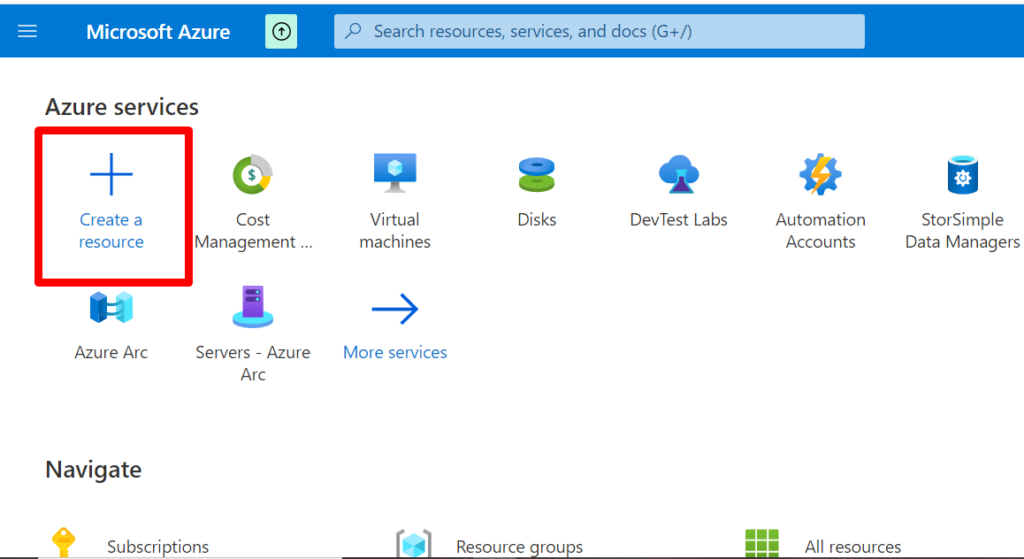
- Sign in to your account at Azure Portal.
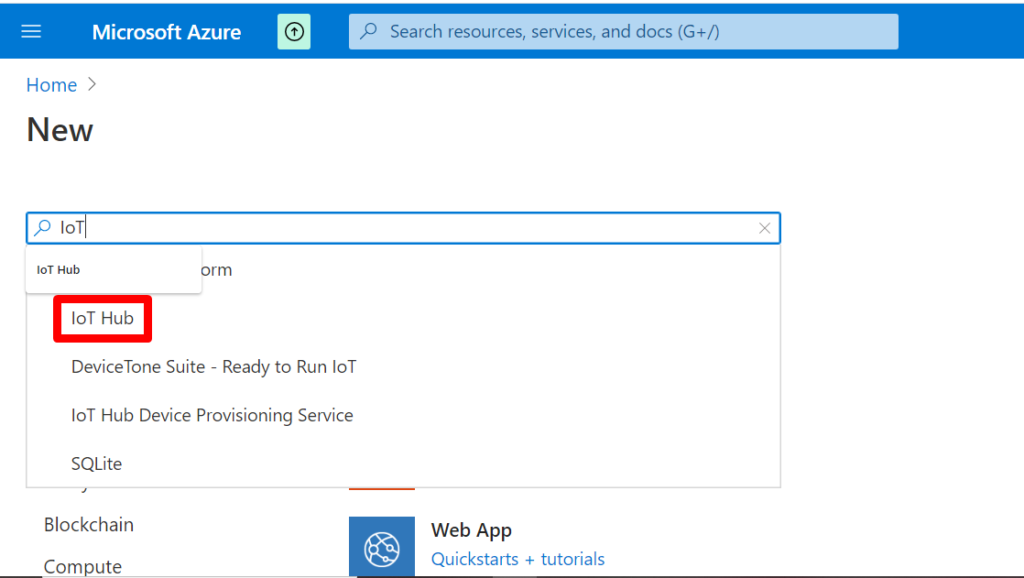
- Click Create a resource and enter IoT Hub in the search box and press enter.


- Choose IoT Hub and click Create.
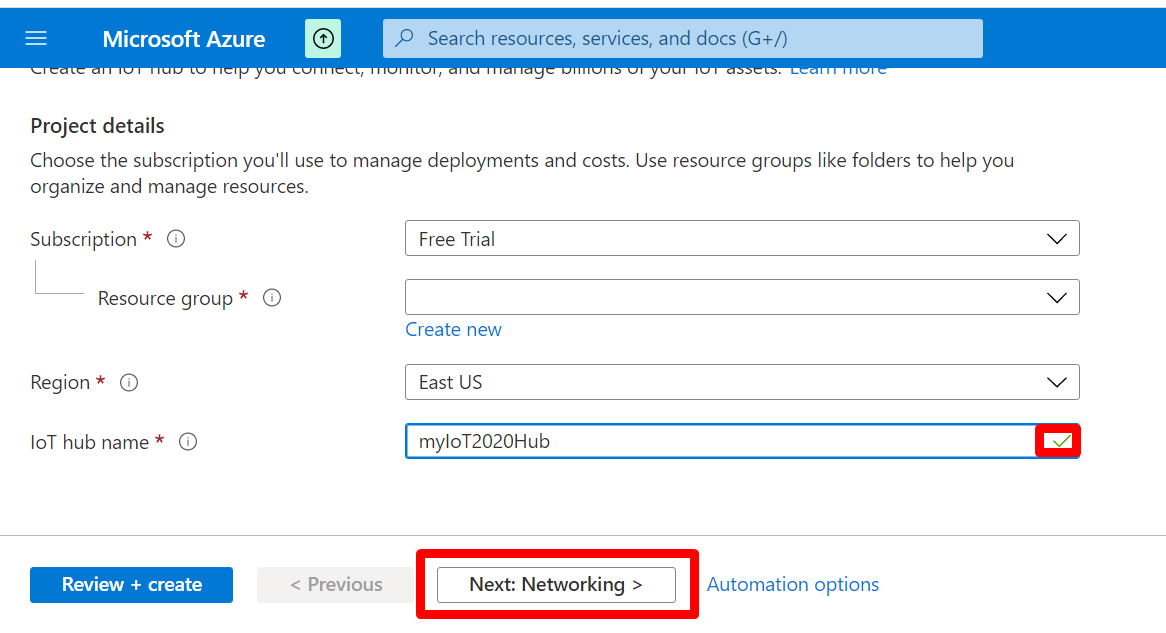
- Fill in the information as required: Subscription, Resource group, Region, and IoT Hub. Please note that the IoT Hub Name has to be unique. A green checkmark appears if the name entered is not taken.

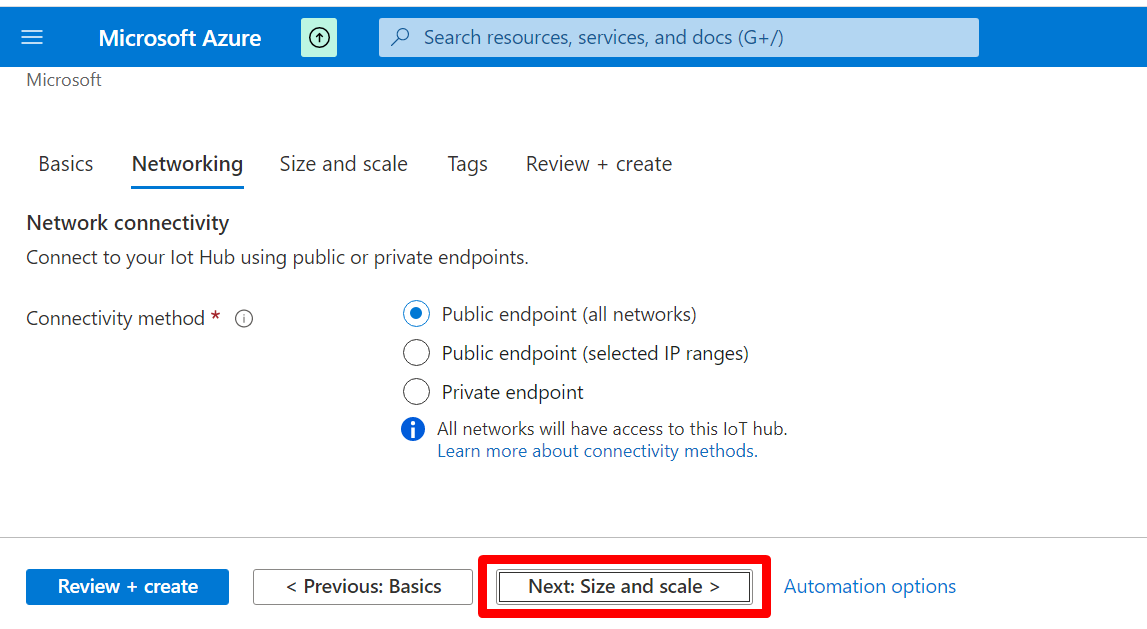
- Click Next and continue providing the information required. Preview your response and then create. It takes a few minutes to have your hub ready.

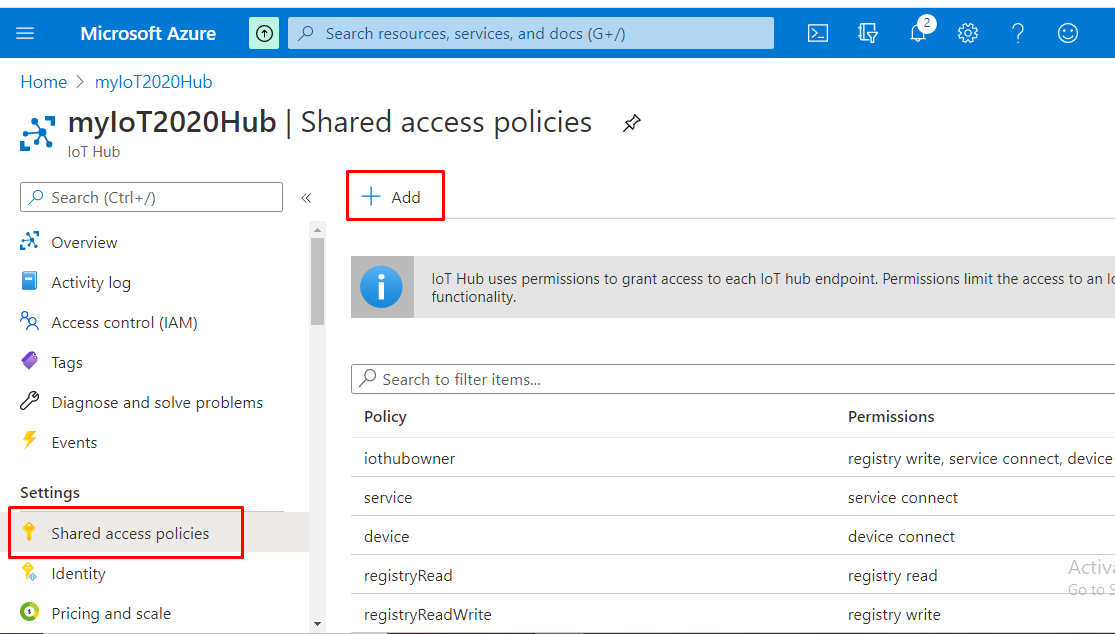
• Add a shared access policy
Go to your Azure dashboard and then click on its icon. Proceed to Shared access policies > + Add to add a new policy. For this article, let us take the reference of an Access Policy which we would like to grant permissions to Particle and click on Create.
- Registry read and write grants read and write permissions.
- Service connect grants permission to access services.
- Device connect grants the send and receive message permission from the connected device’s endpoint.
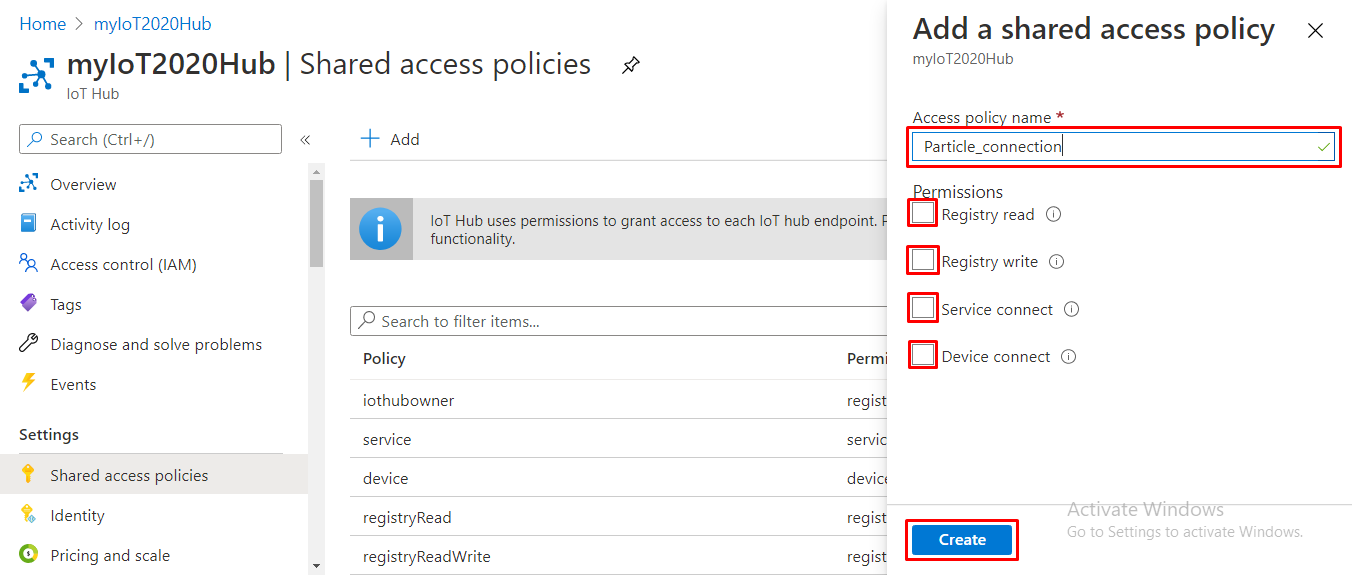
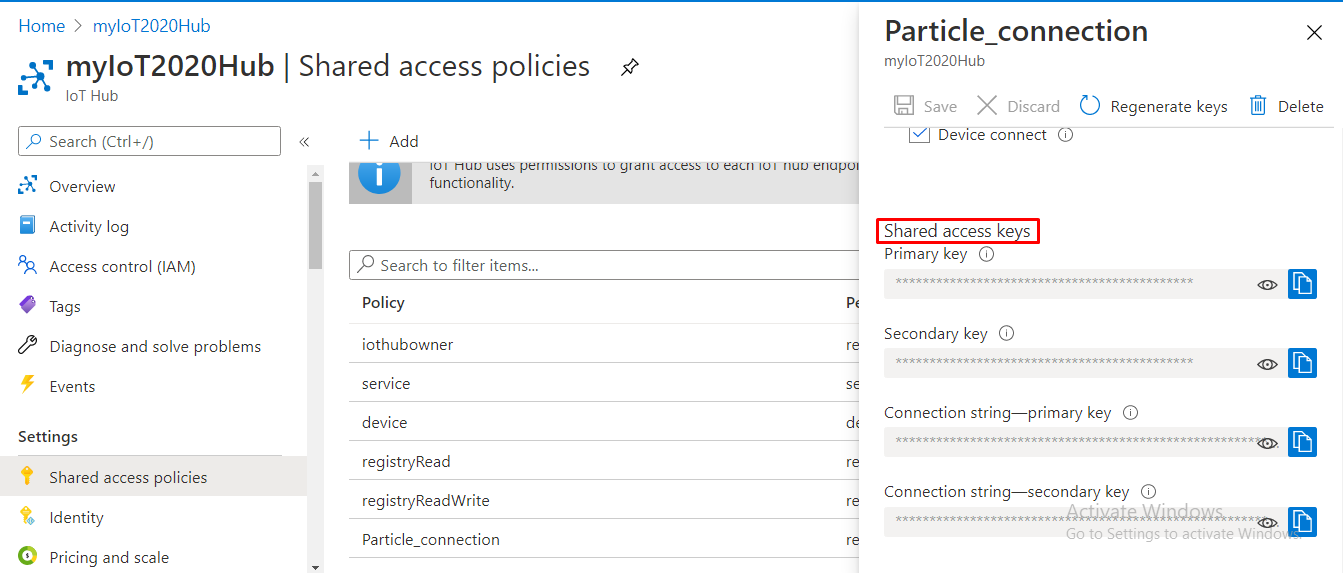
Please note down the policy name and primary key as you will need them in the proceeding steps. This information is always available on your shared access policies in your hub.
• Enabling the integration
You can now integrate your IoT Hub with any other application. In this case, we integrated with a Particle application. So, head to Particle Console and follow the steps outlined in this article. After successful integration, you will need to confirm that the data reaches Azure IoT Hub from your Particle devices.
Microsoft Azure IoT Hub still allows you to register and manage your devices directly without integration with other third-party applications. You only need to make sure that the devices you want to connect to your IoT Hub already have an entry in the registry.
Conclusion
With Azure IoT Hub, you can fully manage millions of connected devices through secure bi-directional communication. If you need a reliable device-cloud and cloud-device messaging service, then Azure IoT Hub is one of the best options available. It offers extensive monitoring of every device in the network and lets you query the device twin to get any information you need on-demand.
- Cloud DNS – A Complete Guide - December 15, 2021
- Google Compute Engine: Features and Advantages - December 14, 2021
- What is Cloud Run? - December 13, 2021
- What is Cloud Load Balancing? A Complete Guide - December 9, 2021
- What is a BigTable? - December 8, 2021
- Docker Image creation – Everything You Should Know! - November 25, 2021
- What is BigQuery? - November 19, 2021
- Docker Architecture in Detail - October 6, 2021